6. Debian Application
6.1 Display
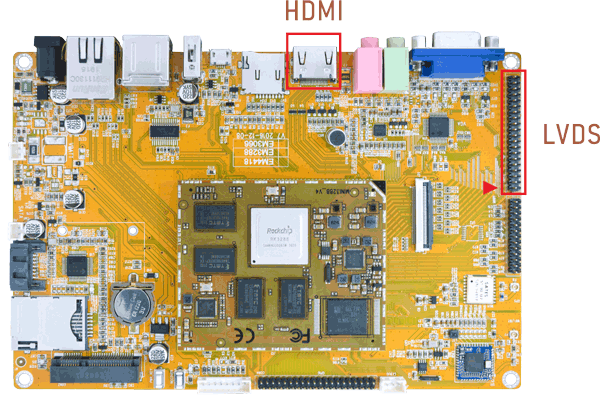
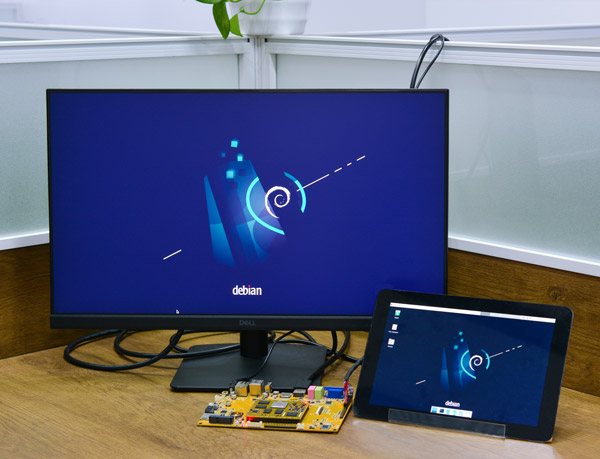
EM3288 Debian11 supports LVDS and HDMI dual-screen different display by default.
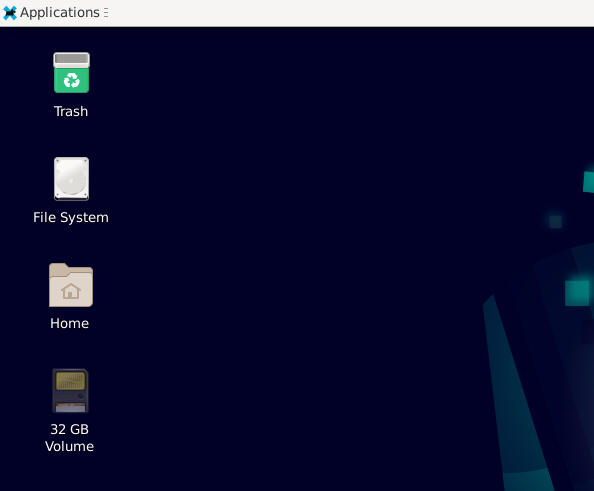
6.2 SD Card

Step 1, insert the micro SD card into the card slot
Step 2, an SD icon will appear on the desktop, click the icon to make it mount automatically.
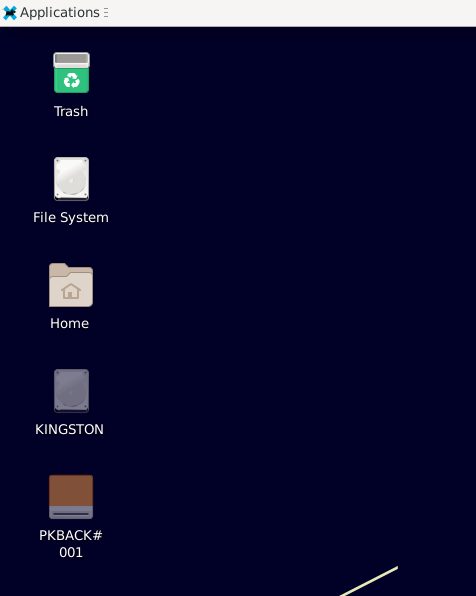
6.3 USB Host

Step 1, insert the USB flash drive into the USB interface.
Step 2, an USB icon will appear on the desktop, click the icon to make it mount automatically.
6.4 Video playback
6.4.1 Built-in playback
The script instruction directory is in /rockchip-test/video, just run it.

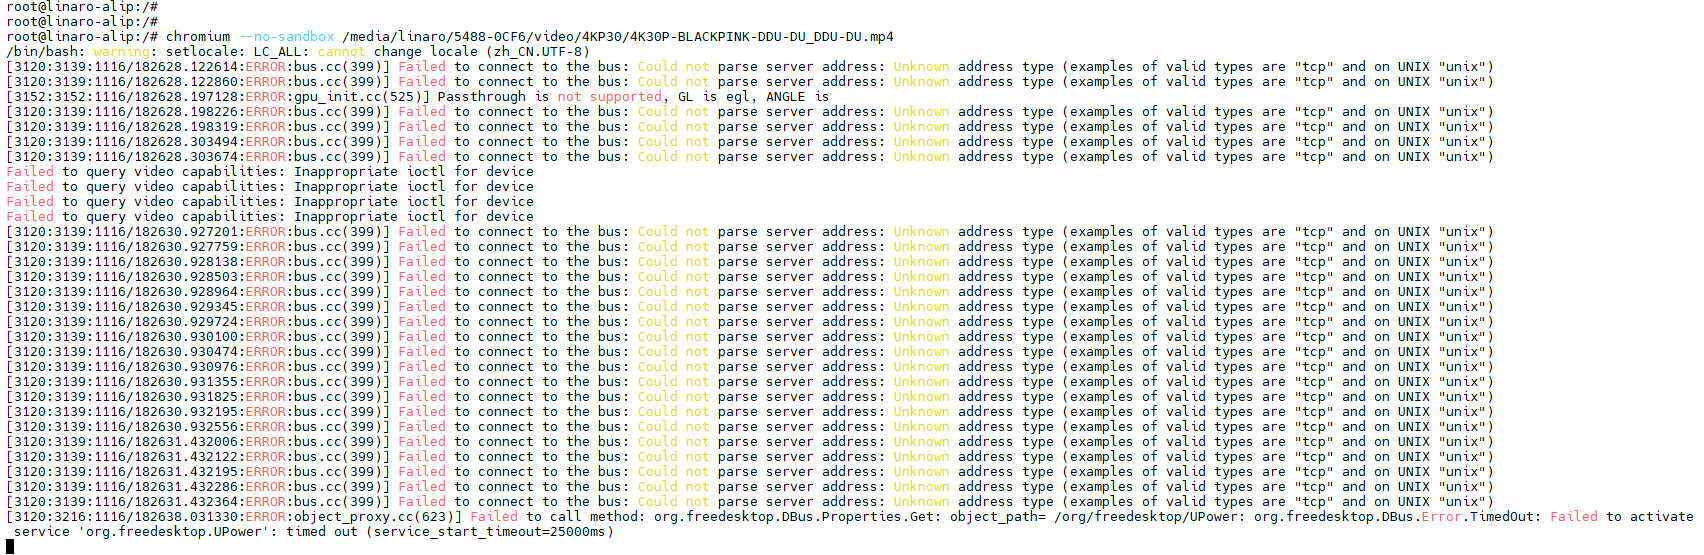
6.4.2 Browser playback
Start the browser with a command to play.
chromium --no-sandbox xx.mp4 //xx.mp4 is the video file name
6.5 Ethernet

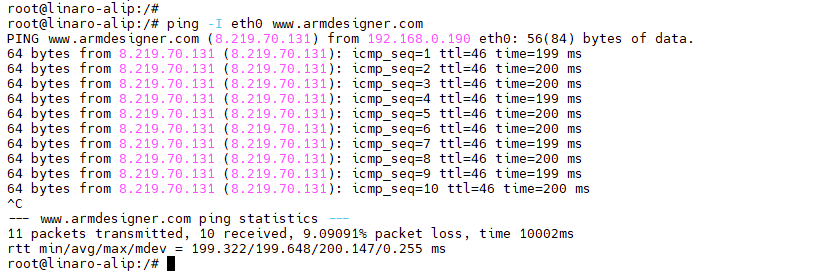
Connect the Board and router with an Ethernet cable.
ifconfig
ping -I eth0 www.armdesigner.com

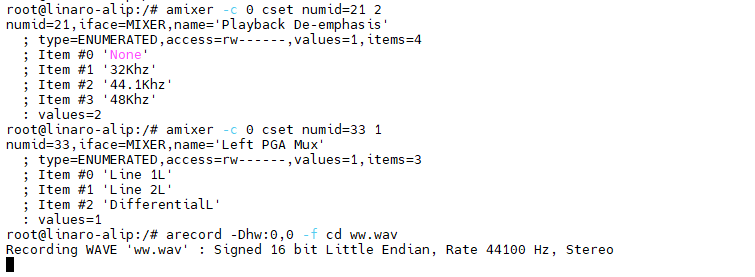
6.6 Record & Audio
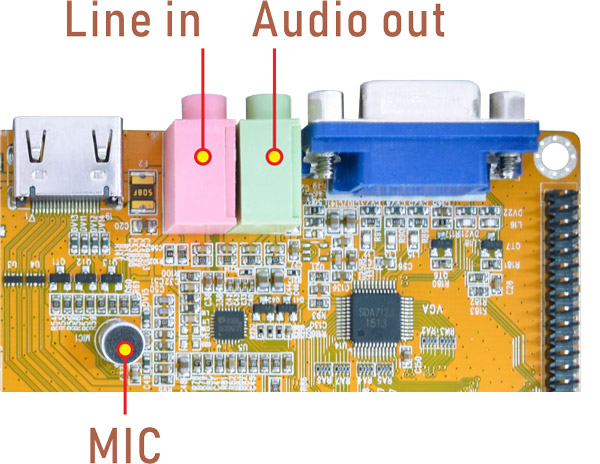
EM3288 supports recording via line-in(headset) or differential MIC.
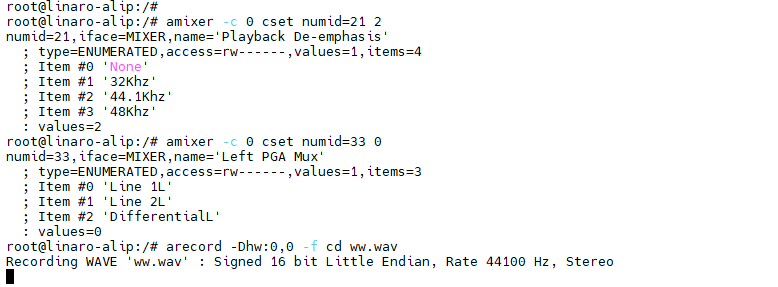
Recording via MIC
amixer -c 0 cset numid=21 2
amixer -c 0 cset numid=33 0
arecord -Dhw:0,0 -f cd ww.wav
Recording via Line_in (Audio input via PC)
amixer -c 0 cset numid=21 2
amixer -c 0 cset numid=33 1
arecord -Dhw:0,0 -f cd ww.wav
Audio playback
aplay -Dhw:0,0 ww.wav //HDMI and headset output synchronously

View more audio parameter configurations
amixer -c 0 contents
6.7 RTC
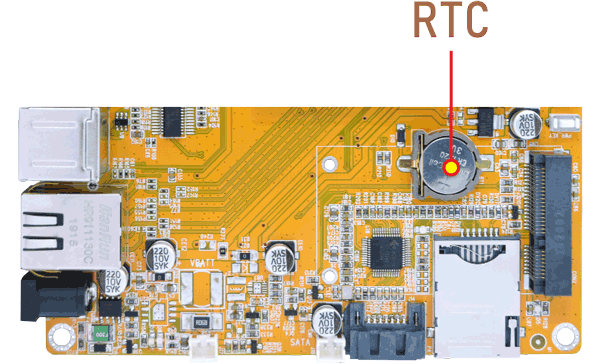
Insert a CR1220 battery before test. It keeps the time running when the main power is off. If we do not insert the battery, the time information is lost if the main power is off and you need to set the time again.
date -s "2023-11-16 17:39:00"       //set system date
hwclock -w                   //set the hardware clock to current system time
hwclock
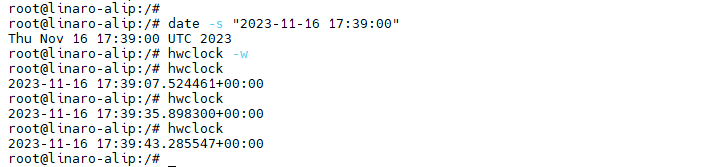
Power off. Wait for a moment, power on again, and then execute the command hwclock. You will find that the time is saved.

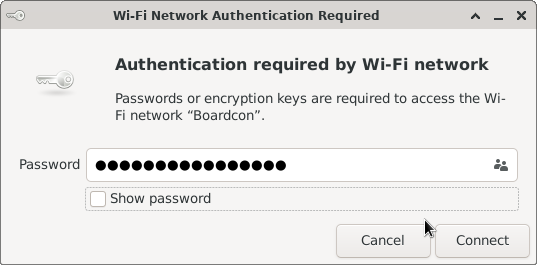
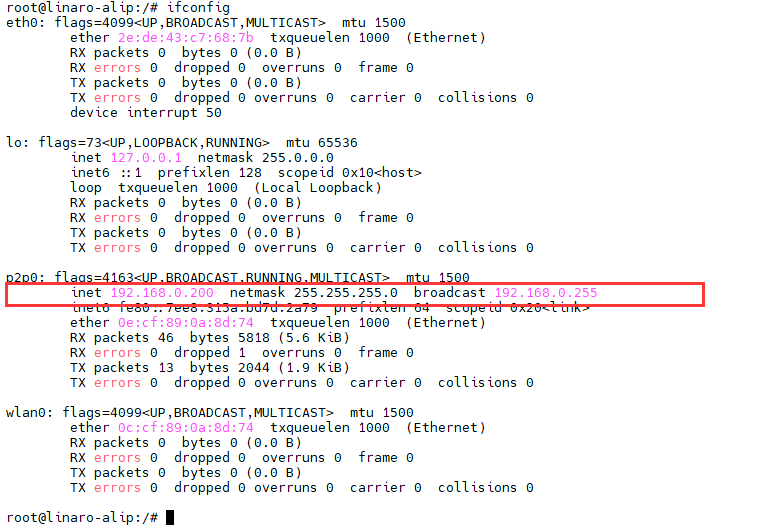
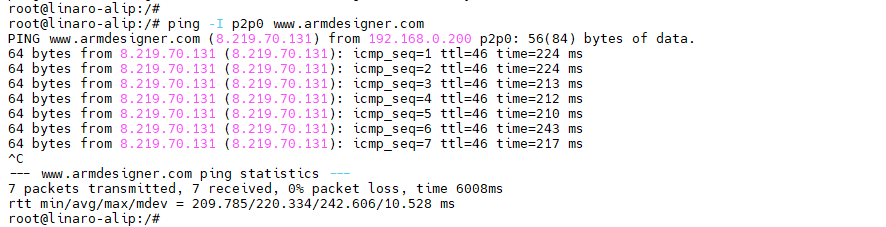
6.8 WiFi

wifi_rtk_on //open WiFi

Click the network icon in the top right corner of the UI interface, select the SSID from the list of available networks and enter the password.
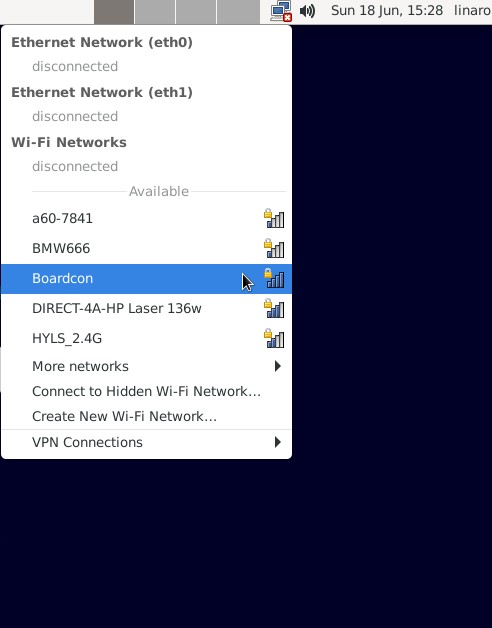
ifconfig         //view the network interface status
ping -I p2p0 www.armdesigner.com     //ping URL to test
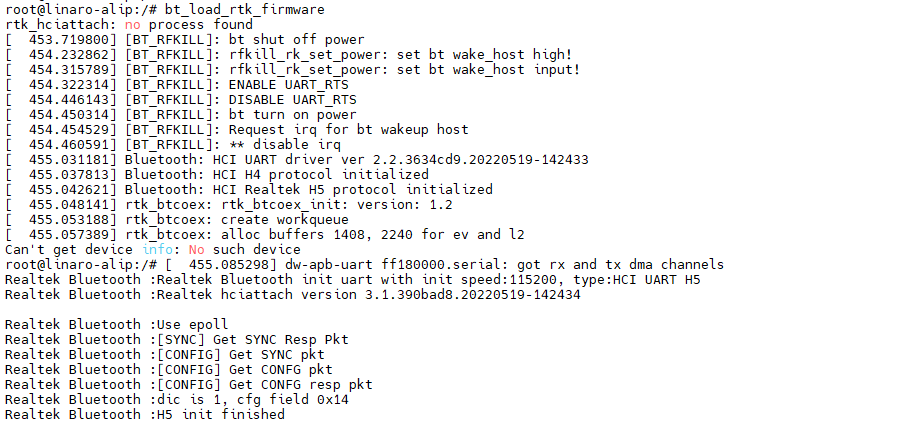
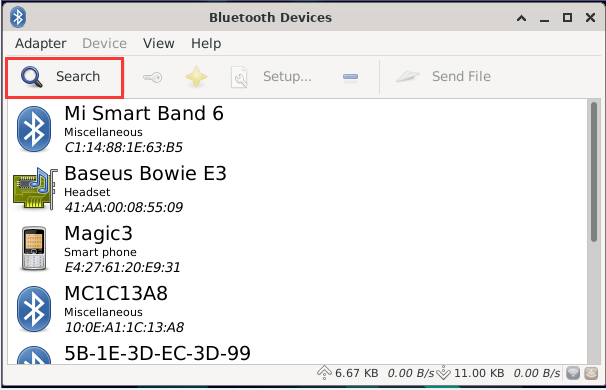
6.9 Bluetooth
bt_load_rtk_firmware //enable Bluetooth
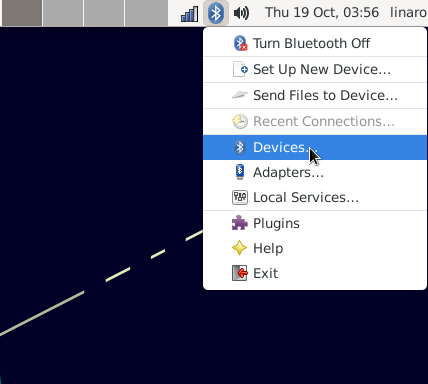
Click the Buletooth icon in the top right corner of the UI interface, then click Devices…
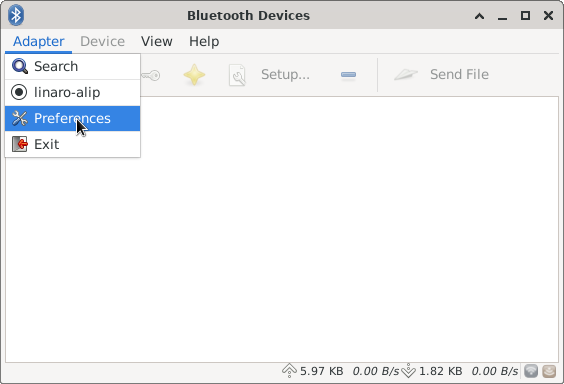
The Bluetooth device name is hidden by default. Set the Bluetooth device name to be visible.
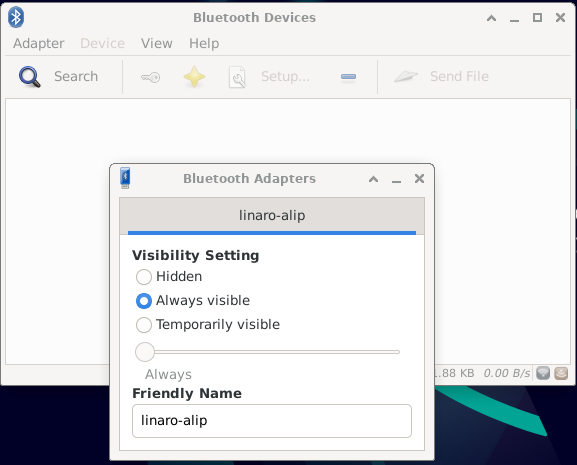
Click Search to select the available device in the list to pair.
6.10 4G
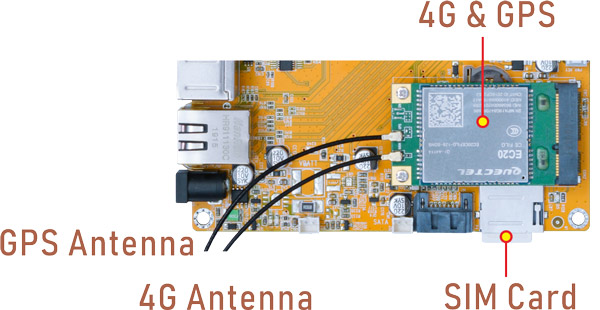
Step 1, Insert 4G module to PCIe slot (4G model: EC20/EC25).
Step 2, Connect antenna and insert SIM card.
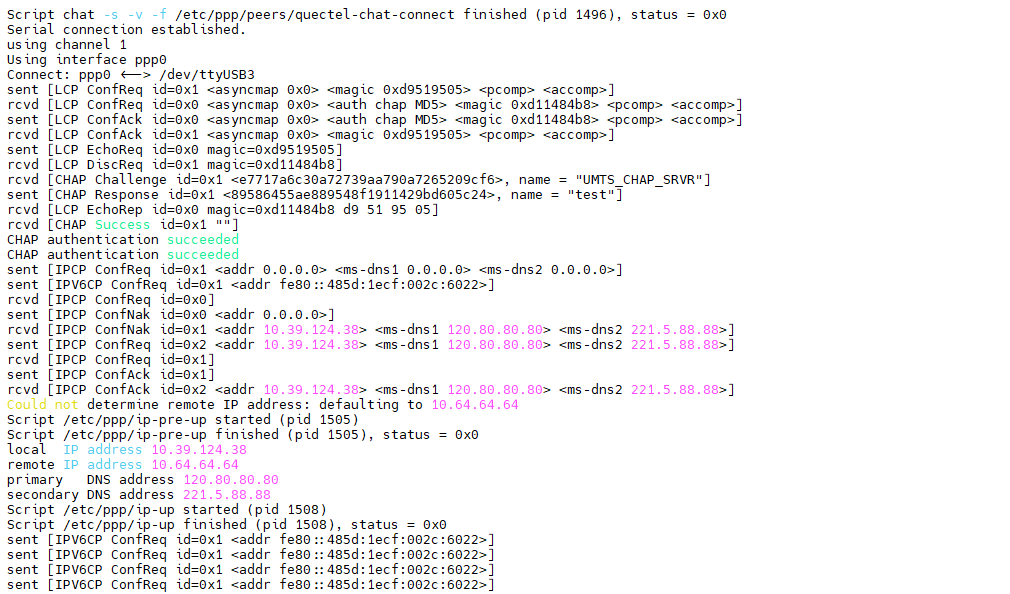
Step 3, Execute follow command to connect 4G network after power on.
pppd call quectel-ppp & //realize ppp dialing
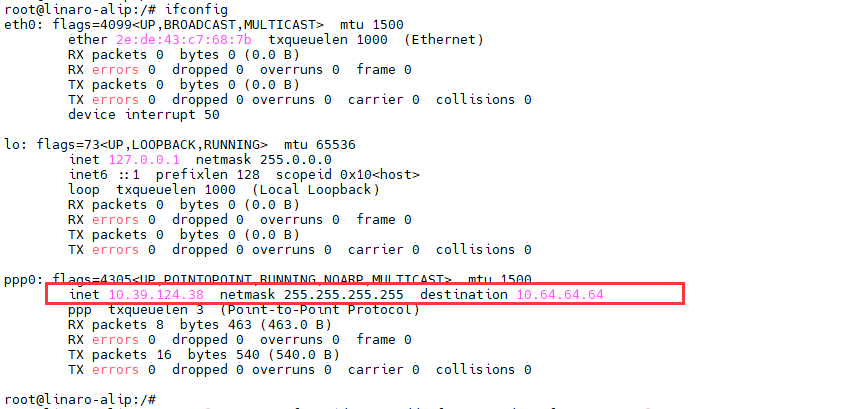
ifconfig //view the network interface status
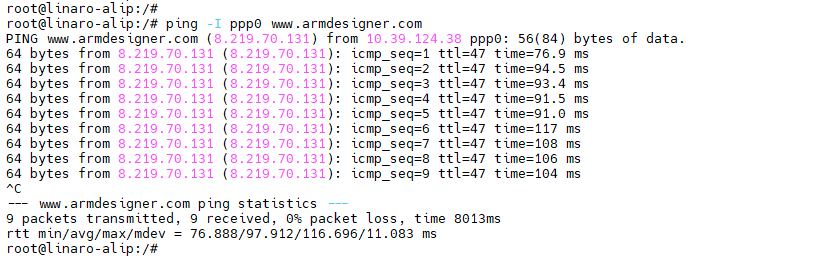
ping -I ppp0 www.armdesigner.com //check network
6.11 GPS

EC20 module combines high-speed wireless connectivity with embedded multi-constellation high-sensitivity GPS+GLONASS receiver for positioning.
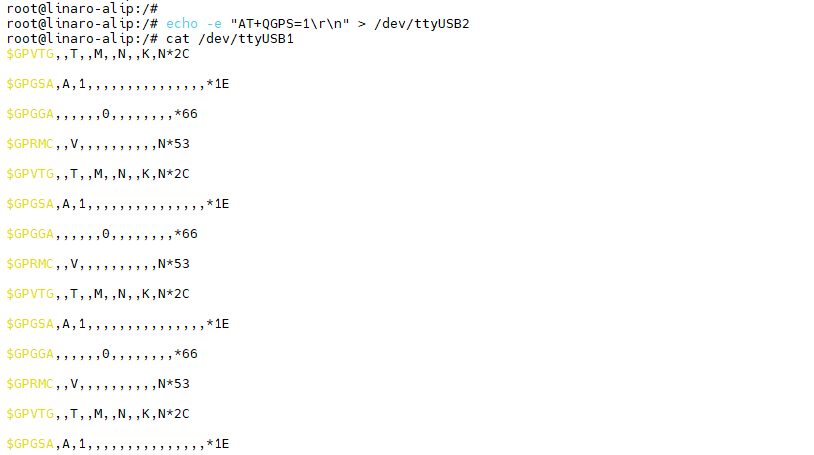
echo -e "AT+QGPS=1\r\n" > /dev/ttyUSB2
cat /dev/ttyUSB1
In addition, the development board also supports a standalone GPS module(Model: ST-91-U7).
cat /dev/ttyS3
6.12 Camera
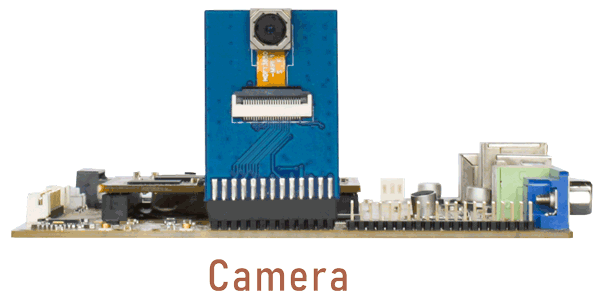
Connect the camera module (OV13850) to the development board before power on.
Check if there are threads in rkisp_3A_server, which indicates automatic startup.
pidof rkisp_3A_server
rkisp_3A_server has started

If there are no threads, execute the following command to start rkisp_3A_server.
/etc/init.d/rkisp_3A.sh start
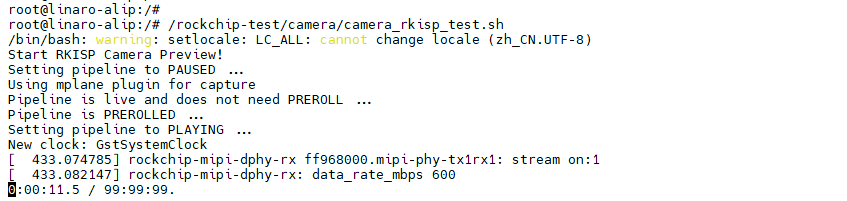
Execute the following command to preview
/rockchip-test/camera/camera_rkisp_test.sh
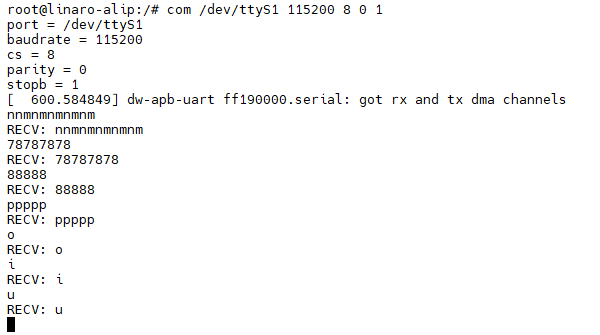
6.13 UART
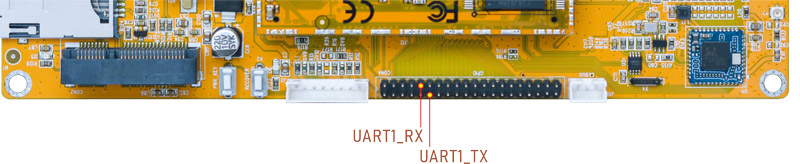
Connect the transmit (TX) pin to the receive (RX) pin of UART1. After executes the command, input character to test UART.
com /dev/ttyS1 115200 8 0 1
6.14 ADB

Install the ADB driver to PC before test.
Connect Micro USB cable and power on. Use the shortcut keys WIN + R to open the windows command run box, type cmd, open the windows console command window.
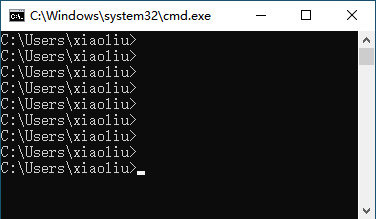
adb shell //enable ADB

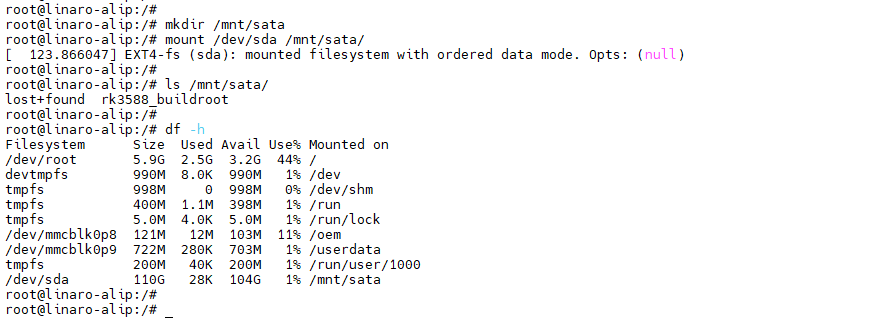
6.15 SATA
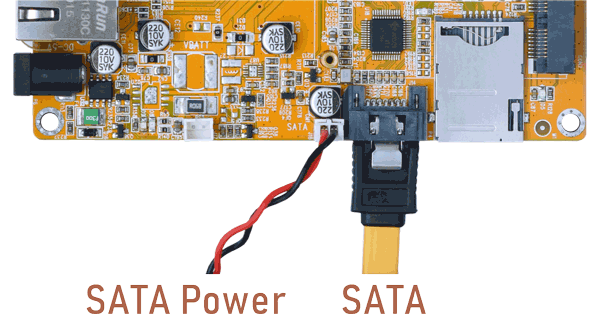
EM3288 Debian OS only supports ext4 format SATA hard disk.
Format hard disk to ext4 file system. If the device is ext4 format, skip this step.
mke2fs -t ext4 /dev/sda //format SATA to ext4
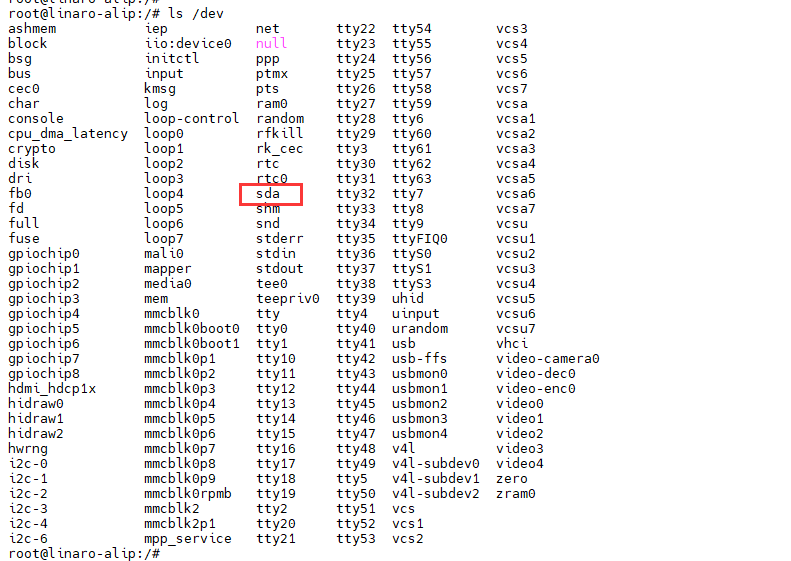
ls /dev //view SATA device name
mkdir /mnt/sata //create a Mount Point
mount /dev/sda /mnt/sata/ //mount SATA
ls /mnt/sata/ //view SATA contents
df -h //view the space size of the mounted disk