5. Flash Images
❶ open RKDevTool_Release\RKDevTool.exe on Windows.

❷ connect PC and development board with Micro USB cable, keep pressing Recovery key and power up until the windows PC shows Found one LOADER Device, then release the key.
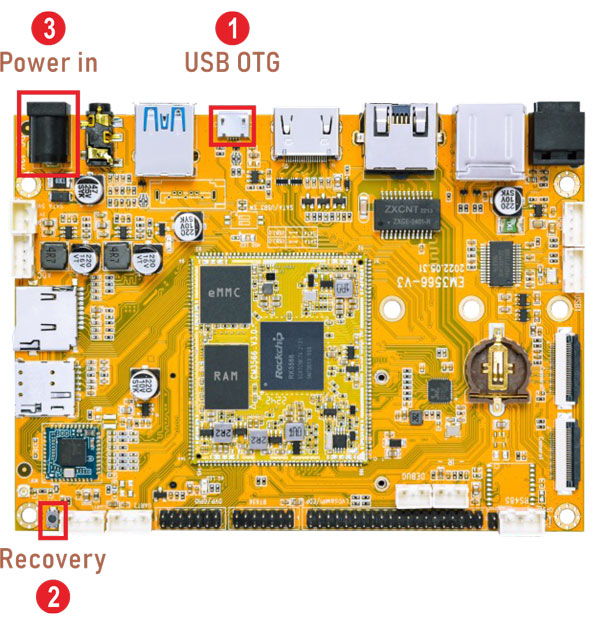
Enter Loader mode
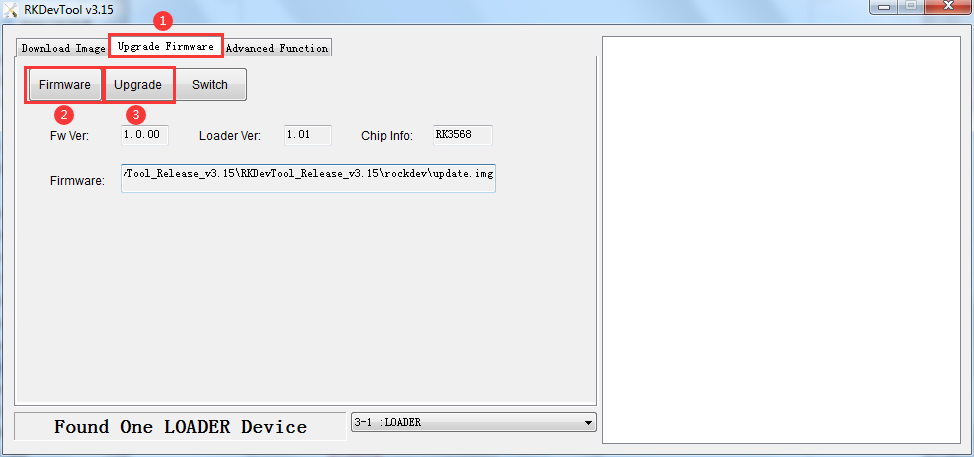
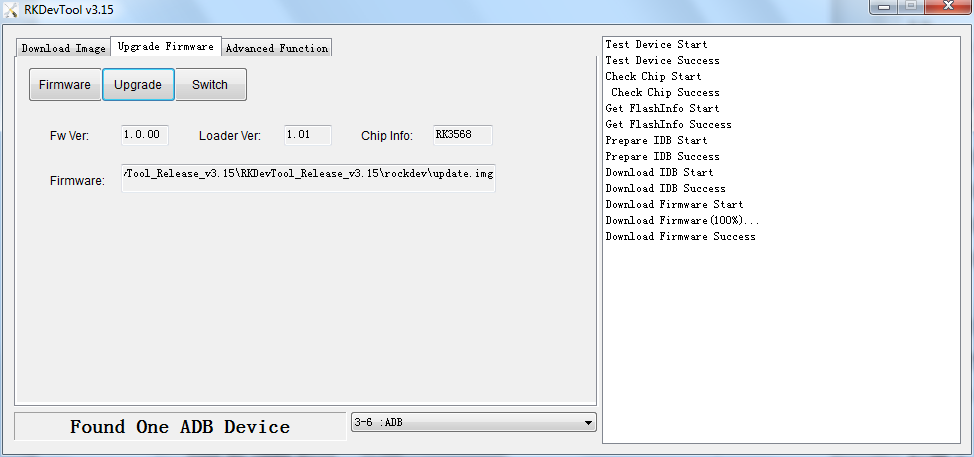
❸ click Upgrade Firmware -> Firmware, select
update.img, click Upgrade to flash.
User can also update the firmware separately.
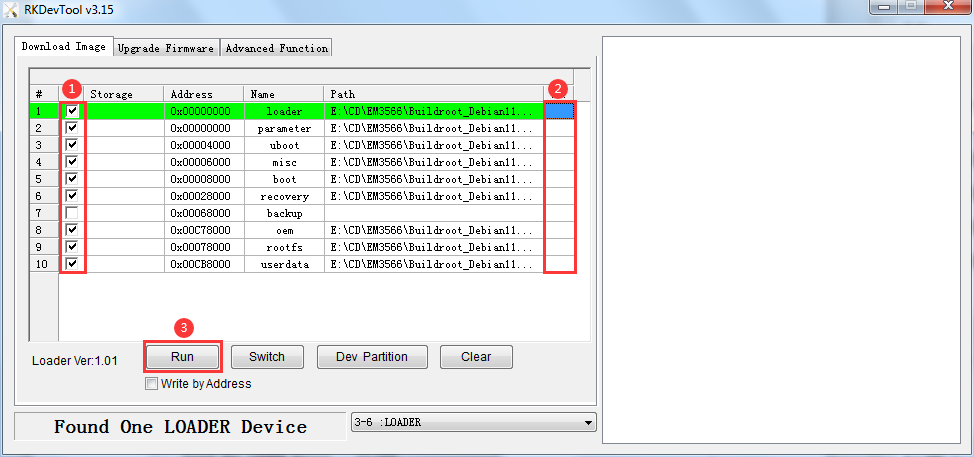
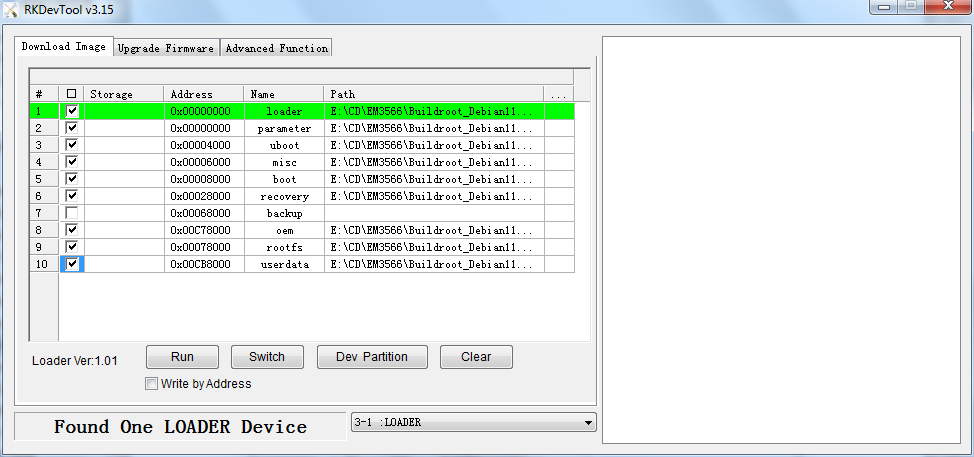
❶ select the checkbox on the left.
❷ click the column on the right side for the path of the file want to flash.
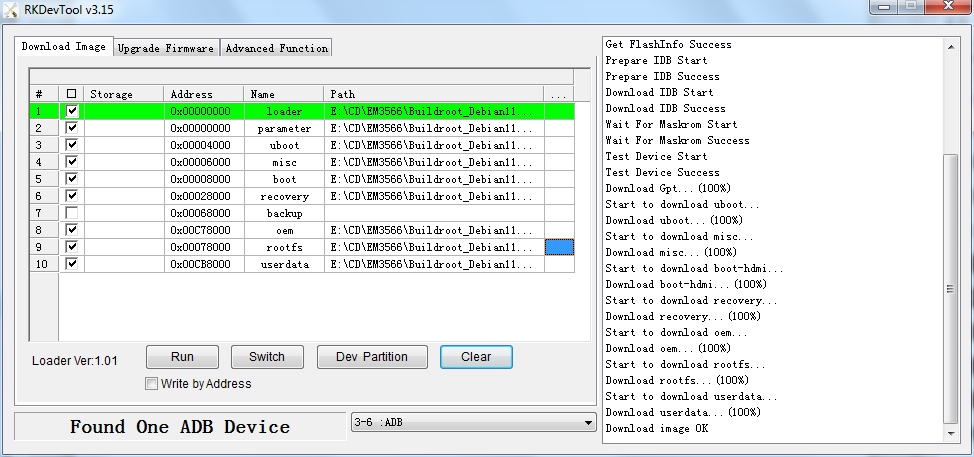
❸ click Run to flash the image.